Sunday, July 22, 2007

Fini

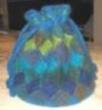
Ahh, where has the last week gone? I finally had a chance to finish the small stranded bag I've been working on for the Purse Round-up KAL. I finally decided that I just wanted a long simple strap, but I had to come to terms with what was rapidly becoming my nemesis: I-cord. I don't know about you, but it drives me nuts when what seems like nice strong handles stretch out so much over time. I've even made handles that were really a little too short for a bag, knowing that eventually they'd stretch out and be about right in time. And I knew that the longer the handle style the worse the problem would be.

Well I think I've come up with a good solution for my I-cord woes. I started thinking - if plastic canvas can be used to reinforce the body of the bag - why not the handles? I had already knit a couple of feet of I-cord and I thought it might be difficult to get a strip of plastic canvas through it, but to my surprise it was actually pretty easy. I didn't try to get too wide a piece of canvas through the cord, partly because I figured it would be too difficult and partly because I wanted to allow for the yarn to shrink around it. I had to sew together three lengths of the canvas strips to make it long enough and still have a few inches left to stick out on each end. I made sure the cord was loose on it (no stitches stretched out too much) and went about felting it. After one wash one of the ends had actually worked its way up into the I-cord. I was surprised - I had assumed the cord would shrink away from the ends. It was easy enough to retrieve and I readjusted the cord on the canvas and washed it again.

Then I started on the plastic canvas and lining. I like to take a few measurements and fit the individual pieces in the bag before I start assembling. Usually I start with pieces that are a little too large and I gradually cut them down to size until they work. You can see how I angled the corners of the bottom piece (the piece sticking out on the right) to conform to the bottom of the bag.
Here's a view inside the bag with my plastic canvas "box" in place. You might notice that the sides of the box don't extend all the way down the bag. I had been planning on not doing side reinforcements at all at first. Then when I decided to attach the handles on the sides, well I had to have some extra reinforcement for them. I think the pieces I used will provide plenty of strength for the handles and I saved myself the touble of having to fit (and sew) the side pieces all the way down to the bottom.

Then I cut my lining pieces to more or less fit the canvas box. I assembled the lining by machine, but sewed it into the bag by hand. Each stitch goes through the lining, the top row of the plastic canvas, and then the bag itself. The canvas actually helps keep my stitches nice and even, since I'm making one stitch through every top hole. With the lining I made a couple of tabs for rectangular shaped rings for attaching the handles. I think it gives it a nice finished look.

I got some sewing thread to match the handles and made sure I stitched through the I-cord and the plastic canvas securely. And now for the first time ever, I have knit handles that do not stretch!!

Materials used:
  • Lamb's Pride Worsted - Amethyst, Aztec Turquoise, Red Baron, Blue Boy, and Autumn Harvest (1 skein each - in very small amounts of each!)
  • Noro Kureyon - #182 (most of 1 skein)
Needles
  • Size 10 Denise Needles
  • Size 10 Bamboo DP's
Pattern: My design

Finished measurements:

Height - 8"
Width - 10"
Depth - 2"
Handle - 37"

Wednesday, July 11, 2007

Living Dangerously

I'm almost done with the little stranded bag I'm knitting for the Purse Round-up KAL I joined. I knit the bag in Noro Kureyon and various shades of Lamb's Pride that seemed to work with it. (I'll list color details when I'm completely done.) And yes, I knew I was taking a bit of a risk mixing these two yarns in a bag I was going to felt. I know that there rate of felting is different after making my entrelac bag mixing the two, but I still liked the results I got with them. I think the main reason it worked with that bag is because I was alternating the yarns on every row of squares, so the small rows of LP were tucked between the larger rows of Kureyon. I wasn't sure what to expect when I stranded the two yarns together though. And here's where a more logical person might think "swatch" but of course I instead just jumped right in and started knitting a bag. I just had a hunch it would work. Here's the bag before felting (and now I'm kicking myself because I forgot to measure it.)

See how the top band is kind of
curling out? I took some sewing thread
and basted the bands shut at the top
so it would keep its shape during the
felting process.

I checked the bag after one washing
and was surprised to see that it was
pretty much done! I've done quite a
lot of felting and I think everything
else I've done has taken at least two
full trips through the washing machine.
Oh I probably could have run it through again but I like the way the yarns look together at this point and I didn't want to push my luck.

Here it is blocking on an appropriate size box I found in my pantry.

I'm pretty pleased with how the yarns worked together. The stitches are a little more apparent with the Kureyon but not much. I think the LP kind of pulled the Kureyon stitches into place and tightened them up.

By the way, it's a good thing I did stop after one wash because when I snipped and pulled out the sewing thread I found that the top had begun to fuse together already. One more wash and I'd have had a real problem opening the bag at all.

I probably won't have a chance to shop for a lining until Saturday. In the meantime I'll mull over what I want to do about handles. It's funny how the little finishing details can really bog things down...I'm so ready to start another bag!

Monday, July 2, 2007

Purse Roundup

I was wandering around on the web a few days ago and stumbled accross a KAL that looked too fun to pass up. It's the Summer KAL - CAL Purse Roundup, perfect for me 'cause bags are kind of my "thing" lately. The rules are fairly relaxed and participants are encouraged to knit or crochet up to four bags (to enter for prizes!) and to have fun and be as creative. I've been checking out the bags already entered and I have to say that there are some truly fun and fabulous bags there! And these women (and guys) are prolific. There's something new to see just about every day.

So I started on another bag right away. I feel like I've been in a blue/green rut lately, so I decided to make something really colorful. I also wanted to play around with a Lamb's Pride/ Noro Kureyon mix again, but this time I decided to do some stranding instead of entrelac. I sketched out some pattern possibilities on some graph paper and started knitting. This is what I've done so far.
I'm kind of wishing I'd made it a little bigger or at least wider, so the Kureyon would change colors a little more quickly, but I think it'll still be a fun little bag. When I'm through knitting I'll felt it and line it. Haven't got a clue what I'll do for handles yet - maybe some purchased ones for a change.

Wednesday, June 27, 2007

Scribblety Scribble

I'm kind of between projects - I'm just itching to start something new, but I'm not sure what. I thought in the mean time I'd post a picture of something I made last fall. I had seen a scarf on display in my LYS and fell in love with it. I loved the simplicity of it, all in stockinette, but the combination of feather light Kidsilk Haze and chunky Colinette Point 5 really intrigued me. The weight of the Point 5 gave it such a nice drape.

Let me say right here and now - this picture does not begin to do these yarns justice. The first time I laid eyes on Point 5 I knew that someday I'd have to have some, in spite of the price. It was a little too rich for my blood the first time I saw it, but a timely gift certificate helped me get over the $22.00 price tag. So how great was it to find a project that only used one skein!

Materials used:

Colinette Point 5 in Gaugin - 1 skein
Rowan Kidsilk Haze in Trance - 1 skein (held double, pulling from each end after rewinding)
Size 17 circular needles. (You have to be able to knit off either side of the needle since you're switching yarns on alternating sides.)

It takes a little getting used to knitting on such disparate yarns. I found I really had to pay attention to what I was doing to not drop a stitch. In my wanderings on the internet I have since come to know this as a scribble scarf. I wore this scarf all winter long. It's not the softest scarf I've ever worn, but I love it and I got so many compliments on it.

I liked it so much I made another one earlier this spring. It's similar to my first one, so I decided to put it away for a possible gift for next Christmas. (You can't start too early, right?)
Materials:

Colinette Point 5 in the Jay colorway
Colinette Parisienne also in Jay. (and also held double)
Size 17 circular needles

The Parisienne is very similar to the Kidsilk and of course the colors in it are a perfect match, but it was almost too perfect. I think in the first scarf the colors in the Point 5 pop a little more against the more subdued Kidsilk. If When I make another one of these I'll make sure the Kidsilk or whatever laceweight yarn I use takes a back seat to the Point 5.

Monday, June 18, 2007

Liner Notes

I finally got around to lining my entrelac tote bag. I knew I there was no chance I would use it without one. I soon realized that I wanted more than just the nice finished look a lining would give - I wanted it to have structure, to stand up on its own without the help of a box of cereal inside it! It got me to thinking though. I knew I wanted to have something stiff on the bottom, but what if I could find some material to do that and to use to make some sides as well, to make my own box?

I decided to check out the nearest Jo-Ann Fabrics since they include supplies for sewing and crafts (although I noted that their yarn selection bites.) While there I found the perfect solution - sheets of plastic canvas made by Darice. I bought a few large sheets and a couple of smaller, stiffer ones, all in the same guage (7 holes/inch) so they could easily be sewn together. I used two layers of the stiff mesh for the bottom, making it very sturdy. I cut the narrow side pieces a little wider than the bottom, so the corners flair out a bit, giving it more stability. I found it really easy to work with - I just kept trying it in the bag and making adjustments as necessary.

Once my "box" was ready I cut out the pieces for a lining, making sure it fit the box. When sewing it all together, I just made each stitch through the lining and the top of the mesh underneath it working my way around. By the way, JennySlash, I was going to go with the batik, but by the time I got back to the quilt shop it was gone. So I went with my second choice and I like how it turned out. I think the little squares are a nice whimsical touch with the entrelac.
And boy does it stand up! Empty, full - it doen't matter. I think the only thing I'd change is the way I did the handles. I think I should have found a way to fasten them directly to the mesh so they wouldn't pull on the bag as much but it would have been difficult to get the placement just right. In any case I think I'll limit how much I try to carry in it. I think I'll limit it to yarn. Yarn's not too heavy. And needles. And maybe a pattern. Stitch holders - they're really light, and a measuring tape......

Saturday, June 16, 2007

This Guy Rocks

I happened to catch this on Good Morning America yesterday and all I can say is, Wow! This guy blew me away. His name is Paul Potts and he appeared recently on a show called Britain's Got Talent (a British talent show, kind of like American Idol.) Stay with me now. He's singing an aria from Puccini's Turandot - you'll recognize it when you hear it. Do yourself a favor and watch this short video.

Monday, June 11, 2007

Walk This Way

No knitting this last weekend. Instead my husband and I spent most of our free time the last few days on some long overdue landscaping. We decided it was high time we replaced the dirt path from the driveway to the front door with something a little nicer. We had a lot of pavers and sand left over from an earlier patio project, so once we had some decent weather and a block of time we got started. We started playing around with a layout for the pavers.


We wanted an informal look - something that would look like weathered stones. We tried to not have any kind of pattern to the layout, but the main consideration was to minimize any cutting. The "stones" are actually cement pavers, but I think they have a nice rustic look to them. They are really heavy and seemed to get even heavier by the hour. My DH was in charge of planning and prepping the area for the path and I was in charge of placing the pavers. When he was through with prep work, he kept me supplied with pavers.

It took a couple of evenings to lay them all out, and four or five hours yesterday to work pea gravel in between them to stabilize them and then a layer of coarse sand on top of that to help fill in around the gravel. (No pictures of that yet - we had a thunderstorm here this afternoon.) We're planning on adding a layer of fine sand next to finish it off.


We're pretty pleased with it so far. You know how it is though - now that this is almost done, everything else is starting to look even shabbier than it did before.