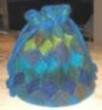
I finally finished writing (and tweaking) my first pattern for one of my bags! It's knit in the round with Lamb's Pride and Noro Kureyon. These yarns do not felt at quite the same rate, but I've found that as long as you alternate the rows of Lamb's Pride with the rows of Kureyon, the smaller Lamb's Pride squares fit neatly within the larger Kureyon ones. I tried to write this clearly enough for anyone, whether experienced with entrelac or not, but just in case there is a good tutorial here which should be helpful. The first couple of times I read an entrelac pattern I couldn't figure out how to do it. I found that I just needed to pick up the needles and do what the pattern said and it all started to make sense. I welcome any questions or comments! Peacock Entrelac Bag
 Finished Size: 12" high, 9" diameter, 28" circumference
Materials:
Noro Kureyon (NK): 3 skeins in color #147
Lamb’s Pride Worsted: 1 skein each
Blue Heirloom - A
Kiwi – B
Jaded Dreams – C
Blue Flannel – D
(You should use whatever colors please you! The second time I made this bag I used Noro Kureyon in color #102 and only three shades of Lamb’s Pride with it.)
Size 11 circular needles 
Size 10 circular needles
Size 10 double point needles
Large Tapestry Needle
Approximately ½ yard fabric for lining, if desired.
ssk – slip both st knit-wise, knit these 2 together
sssk – slip all st knit-wise, knit these 3 together
Cast on 96 st with A on size 11 needles. Place marker, join, and switch to size 10 circ needles
Row 1-2: purl
Row 3-8: *k2 with A, p2 with NK, repeat from *.
Row 9-10: k with A
Row 11-13: *k4, yo, k2t, k2, repeat from * all the way around. Yo’s are where the holes
for the handles will be later.
Row 14: knit
Begin base triangles (still working w/A), working one triangle at a time as follows:
*Row 1: k2, turn work
Row 2 and all wrong side rows: purl back to end of triangle being worked (number of purl stitches should equal number of knit stitches in each previous row.)
Row 3: k3
Row 5: k4
Row 7: k5
Row 9: k6
Row 11: k7
Row 13: k8
Do not turn. First triangle is complete so repeat from* until 12 triangles are formed. Each triangle should have 8 st at its base so everything should come out nice and even.
Now for the fun part!
First Row of Squares** is worked with NK. Turn work to wrong side.
*Pick up purl-wise 8 st down along first triangle, spacing st as evenly as possible. (This will feel very awkward, especially the first st, but go with it. The first square on each tier is always the hardest.)
Slip last picked up st to left needle, p2t, turn. Work square as follows:
Row 1 and all odd (right side) rows: k8, turn
Row 2: p7, p2t
Row 4: p7, p3t
Row 6: p7, p2t
Row 8: p7, p3t
Row10: p7, p2t
(Note: Each time you p2t or p3t you are purling one stitch of the current color you are knitting with one or two stitches of the last row of base triangles worked, effectively joining them on one side.)
Do not turn. First square is complete so repeat from* until 12 squares are formed. First row of squares complete.
Second Row of Squares is worked with B. Turn work to right side.
*Pick up knit-wise 8 st along first square, spacing st as evenly as possible. (Again, this will feel awkward on the first square.)
Slip last picked up st to left needle, ssk, turn. Work square as follows:
Row 1 and all odd (wrong side) rows: p8, turn
Rows 2 and 4: k7, ssk
Row 6: k7, sssk
Rows 8, 10, and 12: k7, ssk
(Note: Each time you ssk or sssk you are joining one stitch of the current color you are knitting with one or two stitches of the last row of squares worked, effectively joining them on one side.)
Do not turn. First square is complete so repeat from* until 12 squares are formed. Second row of squares complete.
Third Row of Squares is worked with NK. Turn work to wrong side.
*Pick up purlwise 8 st along first square, spacing st evenly.
Slip last picked up st to left needle, p2t, turn. Work square as follows:
Row 1 and all odd (right side) rows: k8, turn
Rows 2 and 4: p7, p2t
Row 6: p7, p3t
Rows 8, 10, and 12: p7, p2t
Do not turn. First square is complete so repeat from* until 12 squares are formed. Third row of squares complete.
Fourth Row of Squares worked same as second row of squares, but with C.
Fifth Row of Squares worked same as third.
Sixth Row of Squares worked same as second, but with D.
Seventh Row of Squares worked same as third.
Eighth Row of Squares worked same as second, but with A.
Begin Decreasing Rows. Continue alternating yarns. Color order isn’t crucial, but NK must be worked every other row of squares. Switch to double point needles when necessary.
Ninth Row of Squares worked like the third, except as follows:
Only pick up 7 st and instead of working 12 rows only work 10. In order to decrease the number of rows you just need to work in an extra p3t, so instead of one on row 6, do one on row 4 and another on row 8.
Tenth Row of Squares worked like the second, except as follows:
Pick up 6 st and only work 8 rows. To decrease the number of rows you just need to work in an extra sssk, so do one on row 2 and on row 6.
Eleventh Row of Squares worked like the third, except as follows:
Pick up 5 st and only work 6 rows. Work in extra p3t: one on row 2 and another on row
6.
Twelfth Row of Squares worked like the second, except as follows:
Pick up 4 st and only work 4 rows. Work in extra sssk: one on row 2 and another on row
4.
Thirteenth Row of Squares worked like the third, except as follows:
Pick up 3 st and slip the last picked up st to left needle, p3t, turn.
Row 1: k3, turn
Row 2: p2, p3t
Cut yarn leaving a tail of about 2 feet. Thread yarn on large needle and pick up all remaining st on needles. Pull together tightly and loop through a few times to secure. Stand back and admire the pretty star design you’ve just made!
Handles. Knit two lengths of I-cord at least 3ft long each.
Felting. Thread a cotton cord through the holes for the handles to keep them from closing up during felting. Wash bag and i-cord in a zippered pillow case in warm water. It will probably take 2-3 times through the wash, but check periodically. The Noro Kureyon will take longer to felt and its squares will stay larger, but because the yarns were alternated, they still “fit” together nicely.
Finishing. Block bag on a canister covered with a towel or on some other similar shaped item. I usually do a little tugging here and there to make sure the squares are really square. If you plan on lining (which I recommend) this is a good time to cut out your fabric for it. Cut out a circle and a rectangle to form a cylinder to fit your bag (don’t forget to cut enough for seam allowances.) When bag is dry, thread i-cord through the holes for the handle. If holes are too snug, carefully snip them open with sharp scissors. Sew in lining under the holes.
**They are really rectangles at this point but will transform into squares after felting.

 and I've started a new cardigan that I'm hoping to be able to wear this spring. I figured that even if I don't finish it until the weather's too warm outside, I'll still get some use out of it at work where the AC can be a little much.


 The colors are perfect and I really liked the whimsy of the peacock feathers. As I was working on it I realized I finally had a new name for this bag, something a little catchier that "Entrelac Bag #2." It's now the Peacock Entrelac Bag. It's hard to photograph the lining well, but I'm very happy with the results.
 My cat Murphy is pretty happy with it too. This isn't the first time she's noticed how much it smells like her kitty pi bed.

 I decided not to put a plastic canvas circle in the bottom of this bag as I did in my


 I really needed to have items in the bag to have it stand up and photograph at all well.
 Materials used:
 And now for the gratuitous cat picture....
 I'm making (or rather re-making) the first entrelac bag I designed. It's not exactly a quick knit, but it sure is a lot of fun. I'm knitting it in Lamb's Pride Worsted and Noro Kureyon. Any excuse to break out the Noro Kureyon....
 I ordered it from
  I may not use all of them, I'll probably just decide as I go. Gotta go - I can't wait to get started!